A bit of background
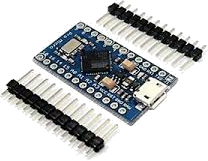
Then I discovered Arduino, especially the Leonardo/ATmega32U4-based boards, and how easy building a HID device is with them.
A friend of mine linked me this video and *BOOM*. Mindblown!

Overview of my projects
I am currently a tenant in a small flat in a big European city (for now, damn Brexit…) so I have room issues. I have two options: make my wife mad and invade her personal space, or squeeze every cm² of my desk. Since option #1 can’t work (a very wise and married guy once said, “happy wife, happy life”), I ended up building my own devices following these criteria:
- portable: my control boxes should avoid DCS-BIOS if possible, HID is the solution;
- flexible: every box must be removable and repositionable;
- simple construction: my tools are limited, everything must be buildable by means of a soldering iron and a simple drill.
My first project has been a blatant copy-paste from the video aforementioned (all the well credits to that guy!) then, project after project, I have written new code, improved it with ad hoc solutions to fit my needs. I have used reminiscences of my high school and used simple circuits such as tension dividers to add new features. If my first project sported only momentary buttons and encoders, my latest has encoders, momentary buttons, latched 2-way buttons, latched 3-way buttons plus a “master mode” selector that raises the available logical buttons to more than 80!
I plan to dedicate a blog entry to each project, plus provide a quick link to the firmware and wiring scheme download.
The links for every part of my guide can be found here.
