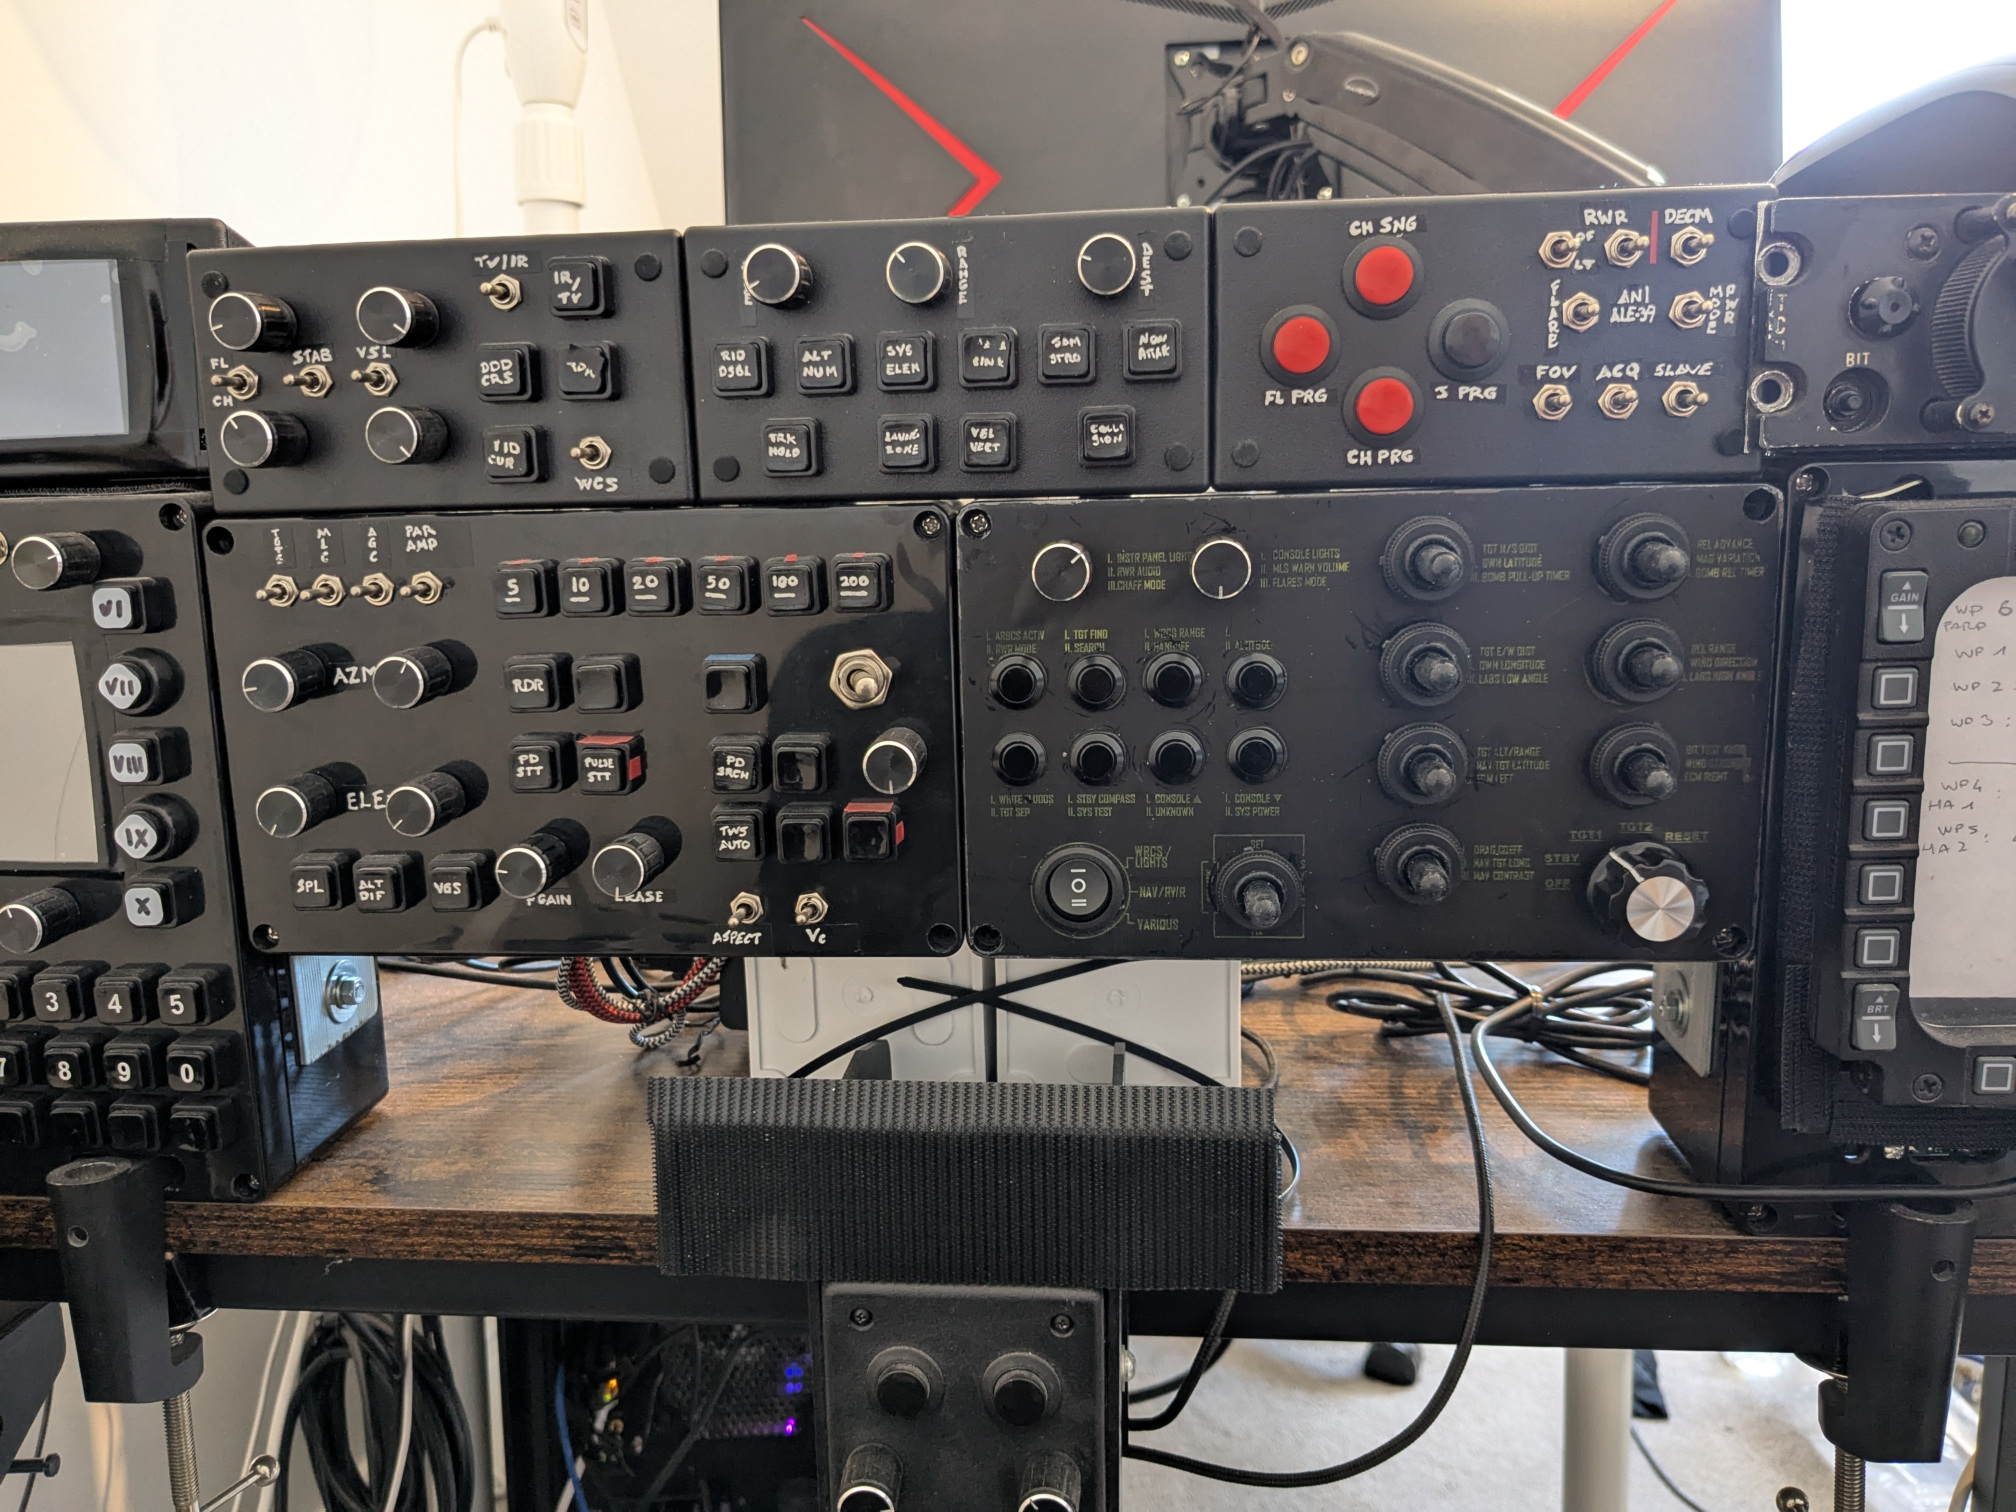
This simple control panel covers a variety of different avionics controls: from the WRCS, acronym for Weapon Release Computer Set, to a number of inputs associated with the AN/ASN-46A navigation computer. On top of that, lights, AN/ALR-46 Radar Warning Receiver, or RWR, and more. In this article, I will go through some of its features and solutions I adopted, to give you ideas and suggestions for building your own control panels.
In total, this 30-quid box provides 99 logical functions, or joystick buttons, if you prefer. It includes:
- two rotary encoders with pushbutton;
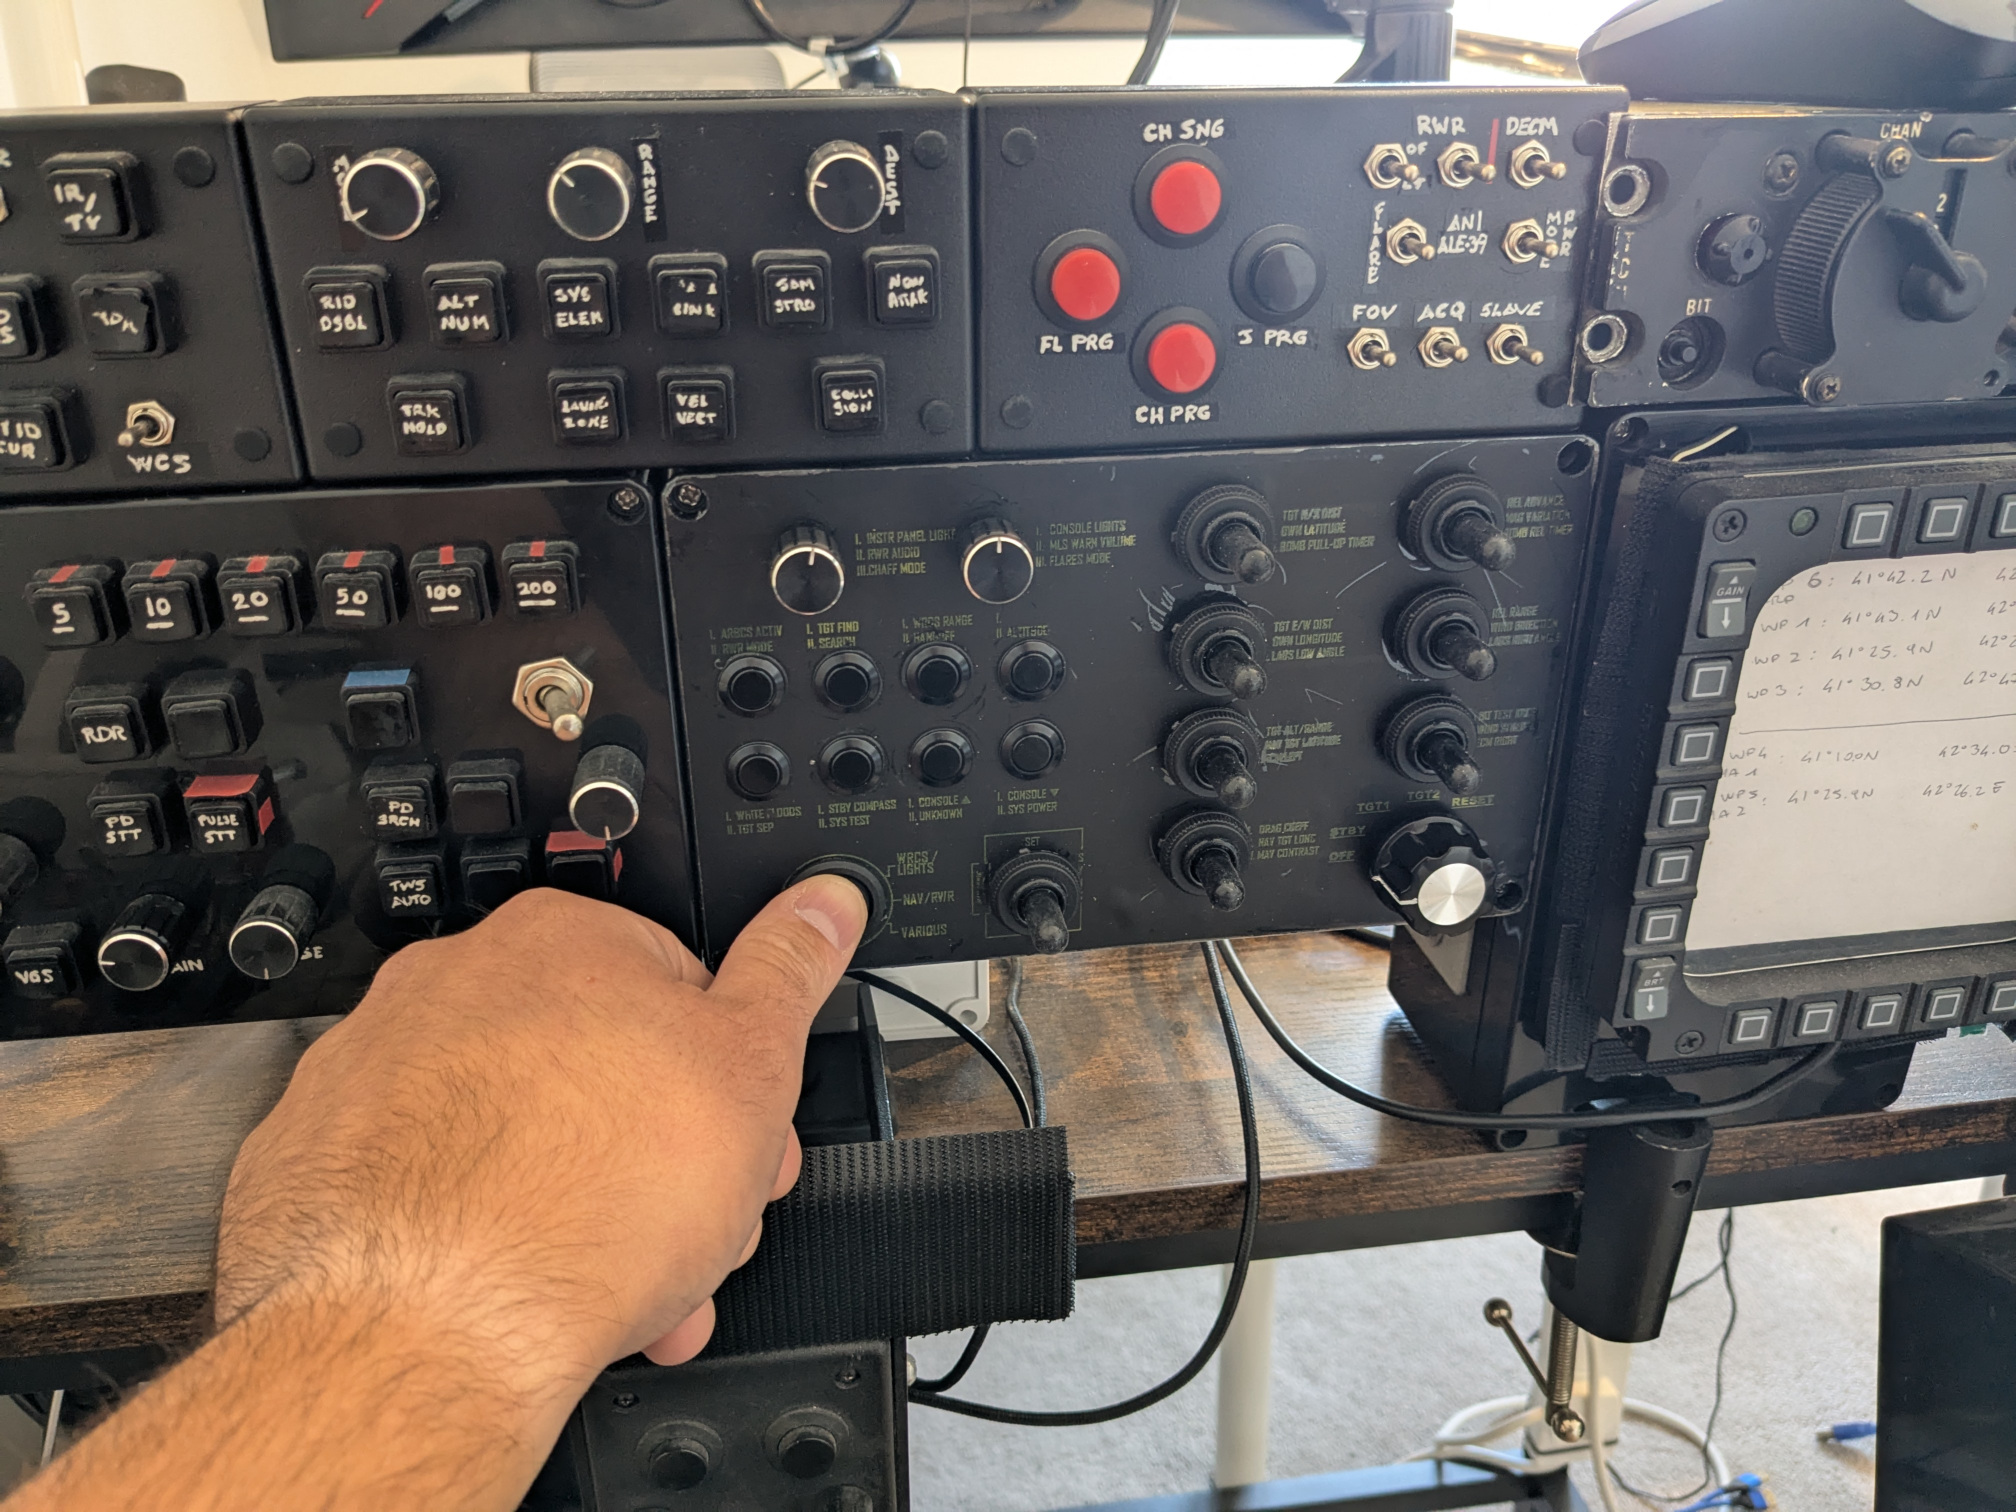
- one 3-way latched switch acting as a “master mode switch”;
- one 6-position knob;
- eight momentary pushbuttons;
- eight 3-way momentary switches.
The panel is based on the familiar Arduino Leonardo. Although there are other boards that support HID and other useful features these days, I have been using this board since 2018, and I can easily recycle most of my old code, thus saving lots of time. And spare time is indeed my nemesis.
Hardware and wiring-wise, a 5×5 button matrix deals with the momentary switches, and a bunch of resistors sort out the knob and the master switch. I can already see all the electrical engineers looking with disgust at the resistors, but it’s a 5-minute solution that does not involve particular coding efforts. Also, a few kΩ cost less than a pound. A port expander costs several times more for a una tantum project.
Only a single pushbutton remained uncontrolled, and since I had two I/O pins free, I opted for controlling it directly, rather than increasing the size of the matrix.
I am quite sure you are wondering why I used momentary 3-way switches rather than rotary encoders. The reason is apparent once we jump in-game. Rotary encoders are unusual devices in the sense that they are also a bit finicky to code, at least compared to a troglodyte 2-way switch, and cannot continuously provide an input. Ergo, if the data I want to select is far from the default setting, I’d be spending quite a lot of time turning the encoders. With a momentary switch instead, I just have to hold it. Moreover, thanks to the plethora of controls provided by Heatblur, I can select the “accelerating” variant of the input, thus making the process even simpler.
The master mode switch is a solution I have been including in every control box, with very few exceptions. Again, it is no rocket science: each momentary button and rotary encoder has an array of HID outputs rather than a single one. When it is time to fire an output, the appropriate value is selected depending on the position of the Master mode switch.
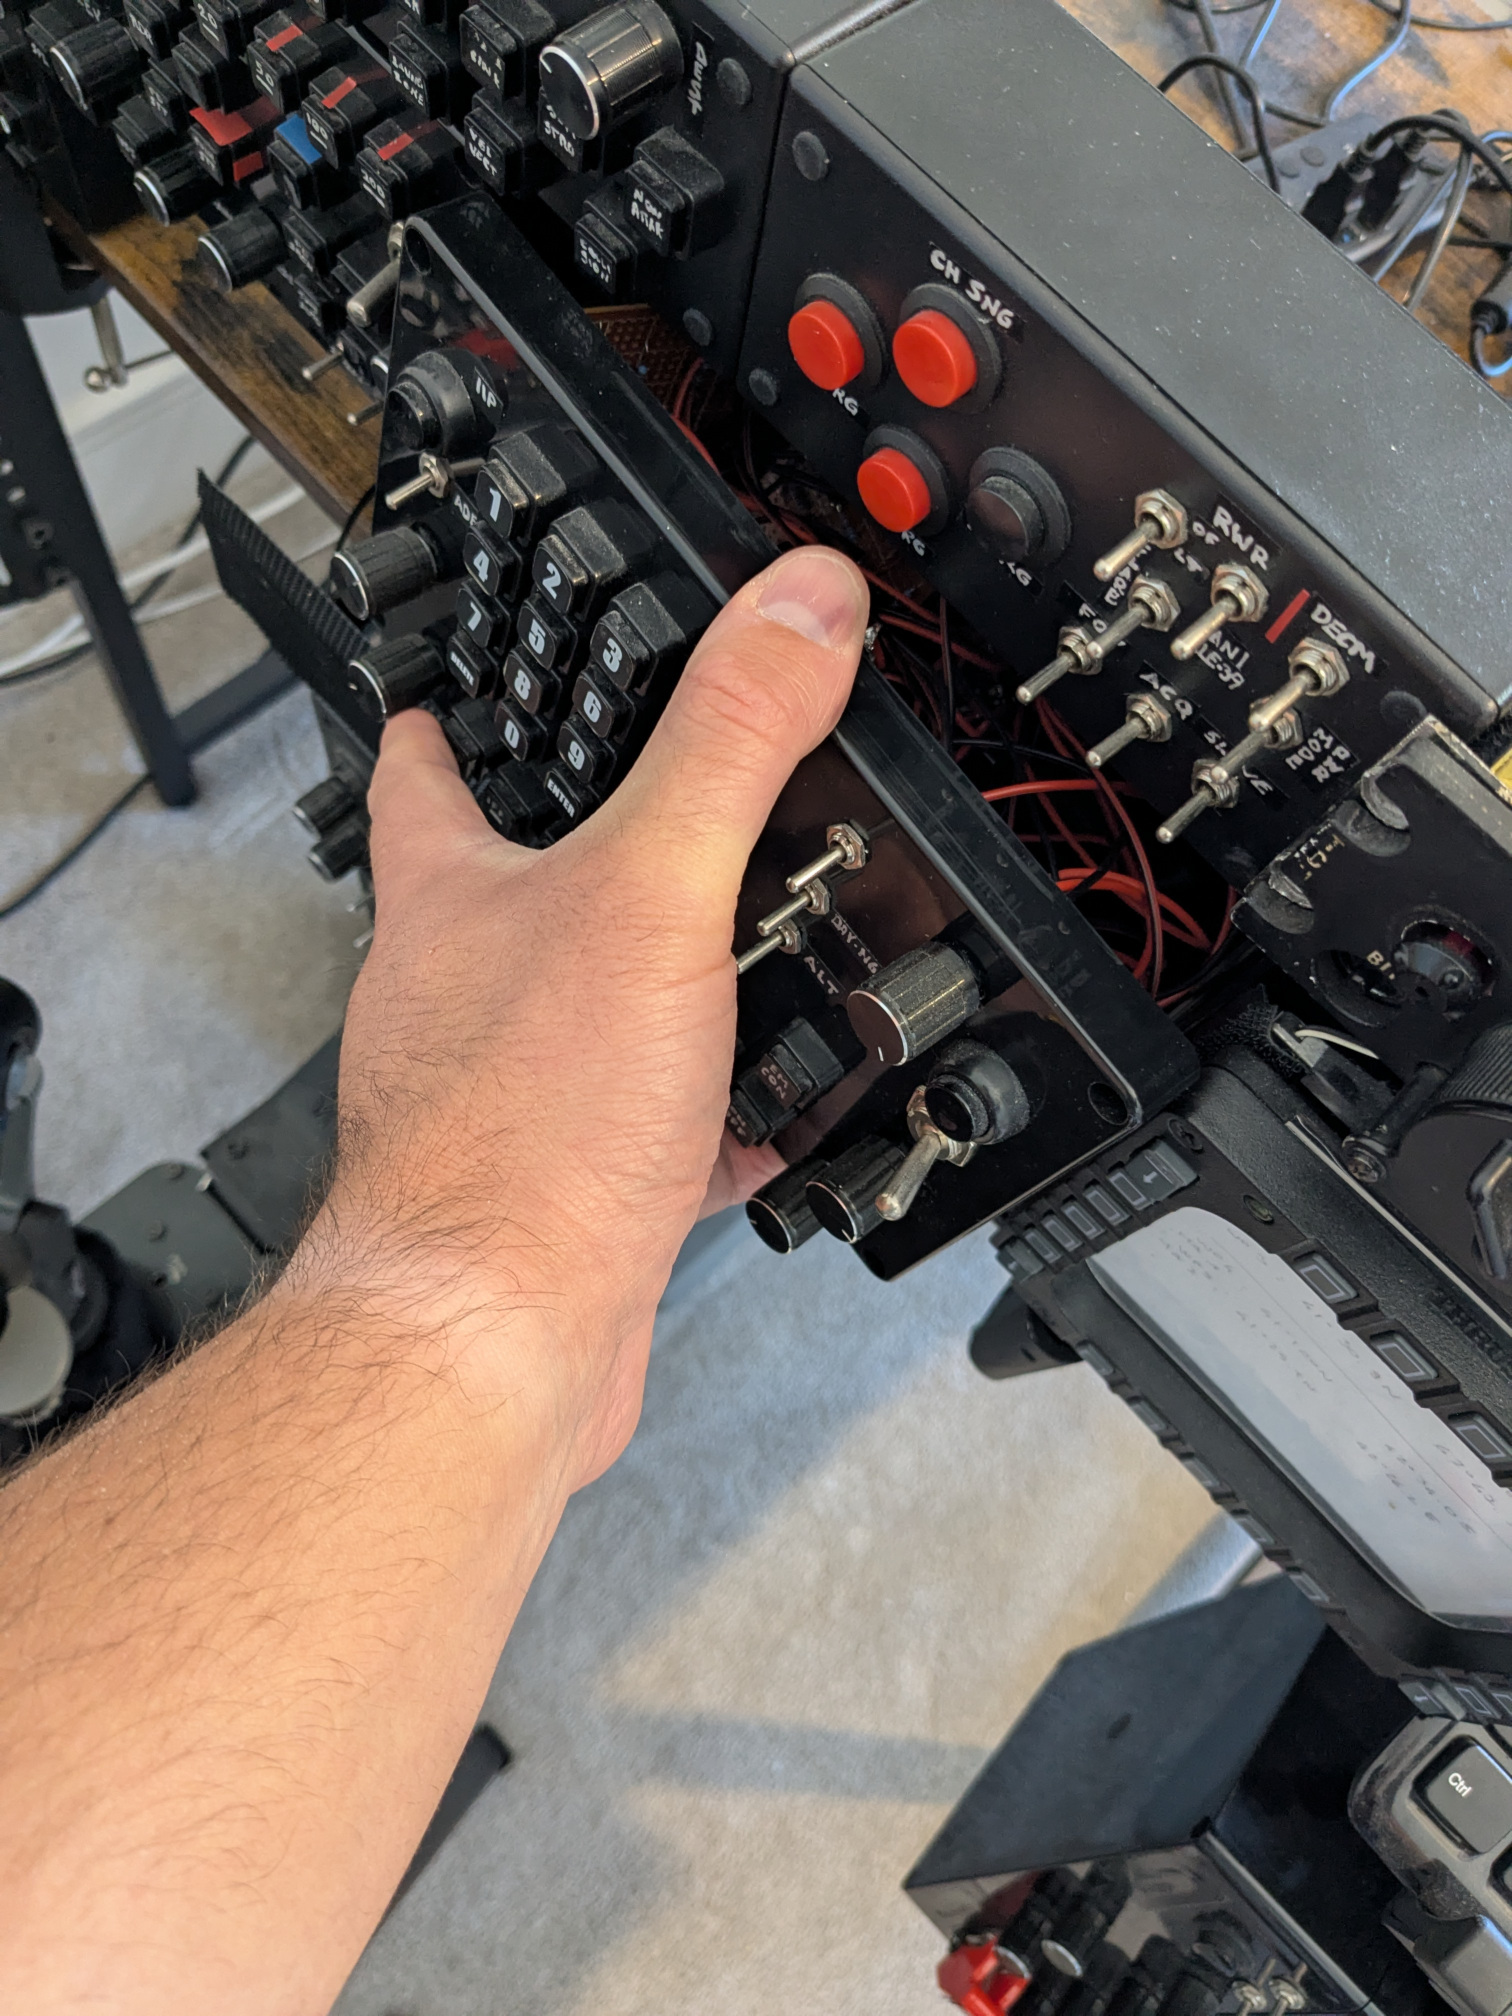
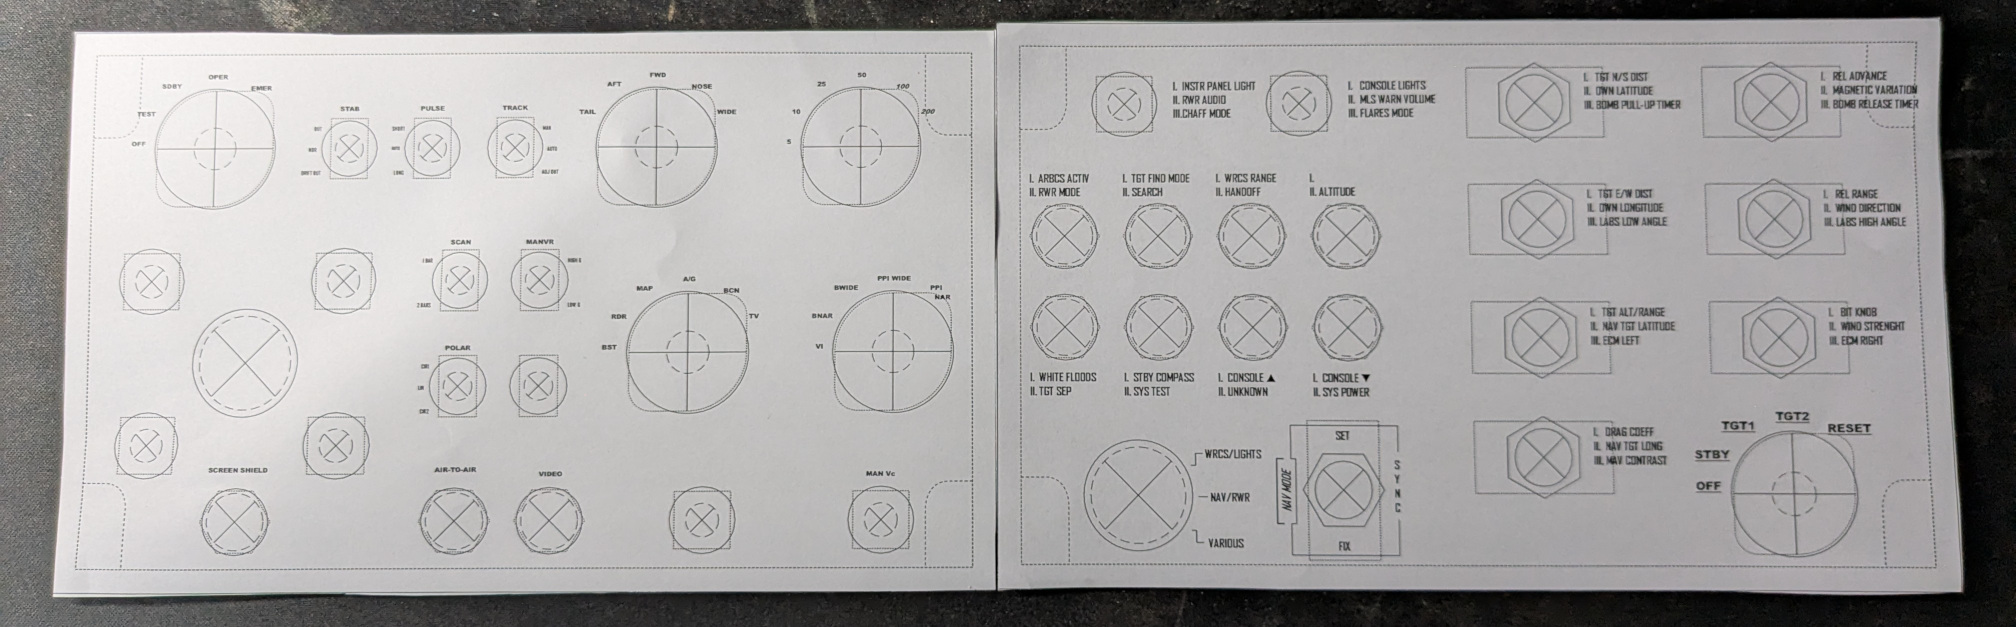
The biggest issue I ran into is the labelling. I bought a bunch of sticky and printable A4 paper. Although my laser colour printer does not print white, it still provides a fairly acceptable yellow/green-ish colour. Besides the size of the font, evidently too small, the main problem is that the colour comes off the sheet just by touching it. Apparently, it is not as laser printer-friendly as advertised.
The result is not awful, per sé. The Royal Air Force Jaguar TACAN you can see in these pictures, also has faded labels. Still, between the dark colour and the scratches, my panel is much harder to read. If I cared, I would have the layout printed professionally, and then I would apply it to the panel. But I don’t. Again, this sort of panel can be made with 30 pounds, more or less, so there is little point in spending more. Otherwise, I would have bought a 3D printer and a compact CNC already.
That being said, this control box can be optimised. For instance, a “plain” button matrix does not support more than one button pressed at the same time. However, this is not a keyboard, and since I am the one using it, I am not bothered by its limitations.
Time-wise, the whole effort took a couple of days. Circa ⅔ of the time was spent on planning, the remaining on soldering and coding.
The next part of the cockpit I am working on is the Radar Control Panel for the AN/APQ-120. This project is vastly more complex, especially due to some… arguable choices I made, let’s put it this way. I hope this little control box has provided you with some ideas for your DIY controls.