
The Navigation Command and Control Grid (NAVGRID) is a feature introduced a few months post launch that allows the F-14 to determine its location using a known position (YY) as reference. In DCS, it can be used to take advantage of the Bullseye reference point.
The F-14 manual provides most of the information needed to use the NAVGRID. It is extremely easy although its operation requires a bit of eyeballing (or waiting for information on the top of the TID to scroll or CAP). Being so intuitive, I don’t plan to go into its details, and a simple overview of the presented information and differences between TID GS and AS can be found in this article dedicated to the F-14 Pilots.
NAVGRID: Settings and positioning
To activate the NAVGRID, switch the TID to GS and activate it from the CAP. Now three parameters can be set:
- Width, by means of [ALT / 4]
- Number of Sectors, by means of [NBR / 2]
- Orientation, by means of [HDG / 8]
Width and Number of Sectors are self-explanatory, the Orientation is slightly more complex: it refers in fact to the heading of the bisector of the NAVGRID cone. Simply put, if the Width is 180°, in order to have the NAVGRID looking towards the North, the Orientation must be 0°.
Habits and reference sheet
A habit I immediately picked up is positioning the NAVGRID so that it has two arms perpendicular to each other, with one pointing towards a cardinal point. I also try to position the NAVGRID to cover the area where the mission is operated plus another sector on its sides. Therefore, for example, if I am operating N-W of the YY, then I want to cover from N-E to the W, having one arm pointing North and another towards the West. I also try to use settings having sectors with the same width every time, usually 30°, so I don’t have to re-train my brain every time.
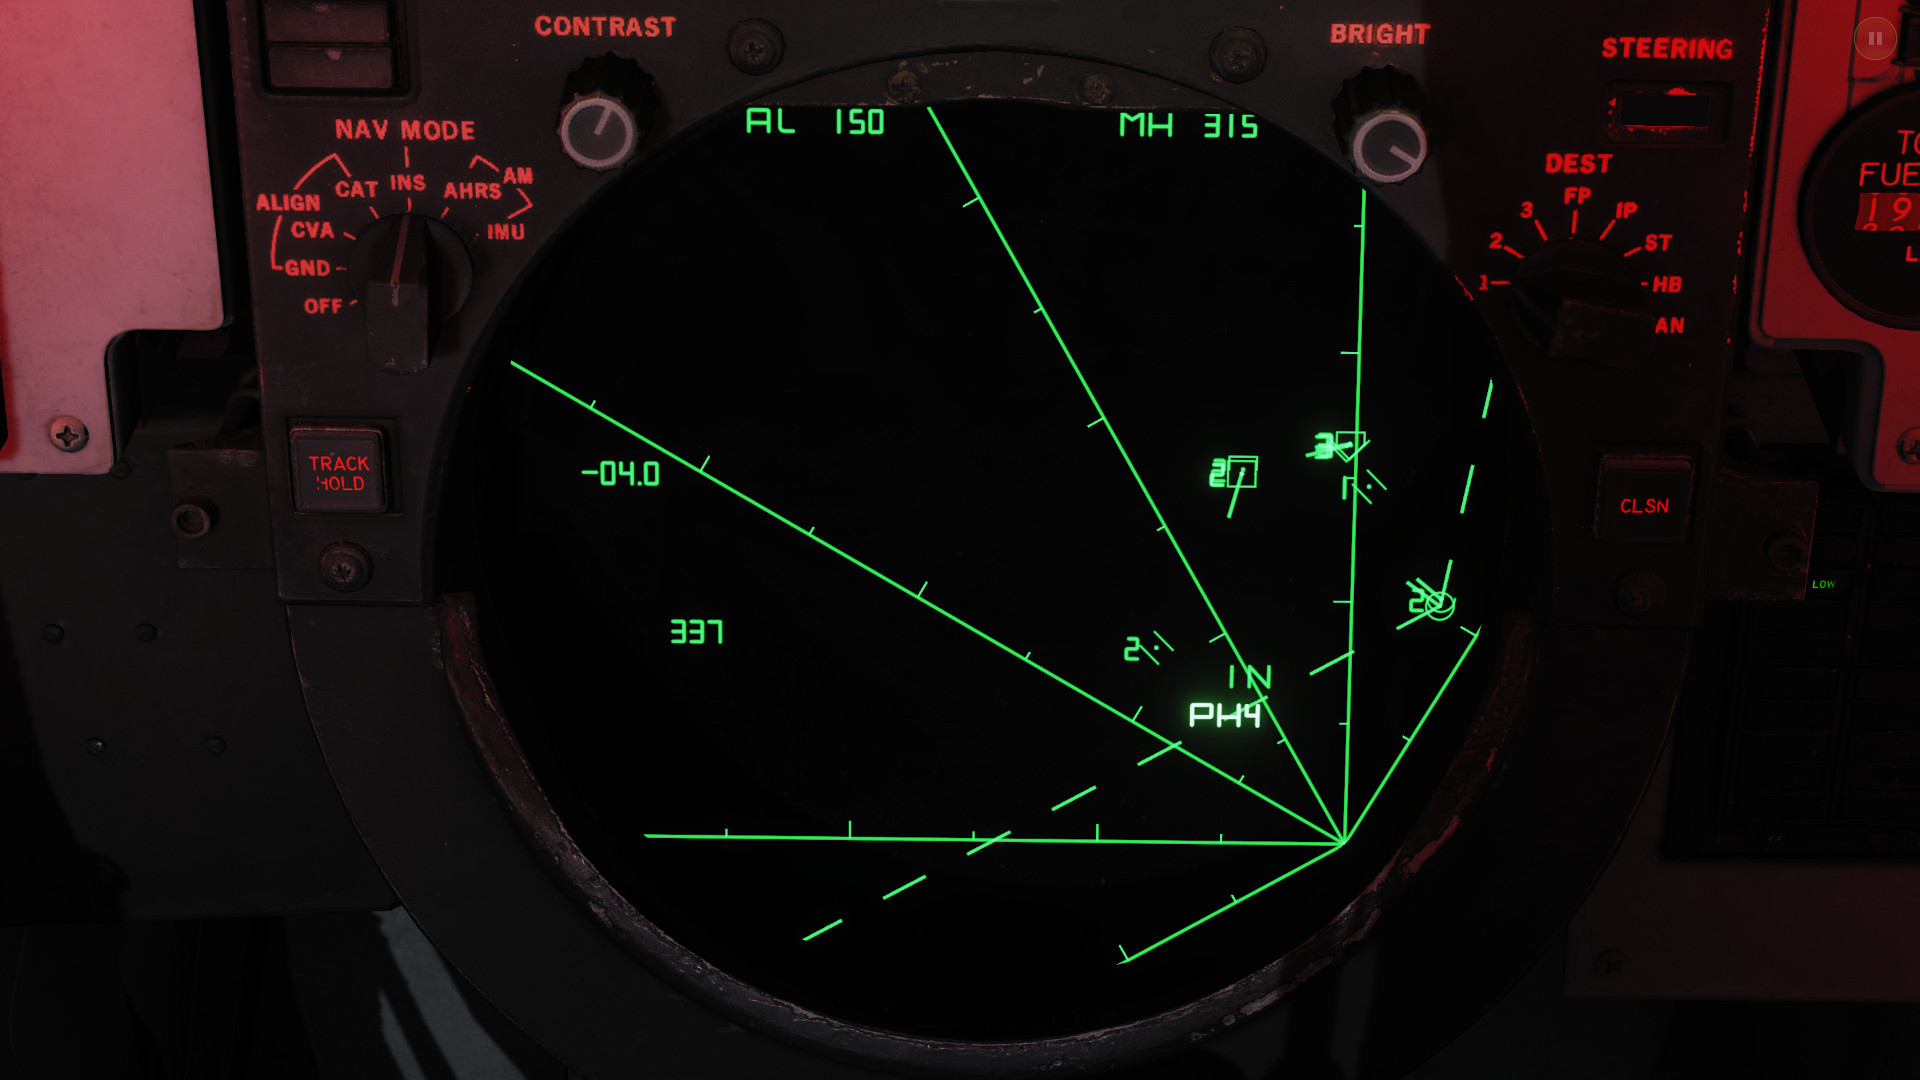
This is a screenshot taken during a training session. The NAVGRID is displayed following one of my common settings:
- Width: 150°;
- Number of Sectors: 5 Sectors;
- Orientation 315°.
If I wanted more coverage to the East, I could have simply set the Orientation to 345°, for instance.
Notable Exceptions
There are some occasions where such settings do not work or can make the RIO’s life straight harder. For instance if the YY is badly placed or very far from the area (a few hundred miles), in this case, using a very narrow cone is a better option.
Another exception is actually the opposite of the scenario just presented: the YY is in the middle of the area. In this case, better place the YY towards the most probable direction from which the hostiles should appear and use the Voice Code (on top of hooking) to get data about targets not covered by the YY.
The NAVGRID is a great tool but shows its age (as most of the avionics of the F-14B), nevertheless it is fairly flexible and works great with a bit of ingenuity.
Reference Sheet
The following is a series of reference settings for the NAVGRID. It is probably not useful to veterans but can help new players (or very rusted ones *slowly raises his hand* ) to quickly set the NAVGRID in the most appropriate fashion for the mission, or to re-adjust it, in case of retasking.


I added this page to my Kneeboard Pack. Once you understood how to efficiently play with the NAVGRID, you may want to delete this page.
As for the vast majority of the content on this site, I try to give inputs, and ideas; then feel free to adjust them as you prefer.